Shapes SDK Front end Example
In this example, we will be building a basic Shapes implementation using the Shapes SDK.
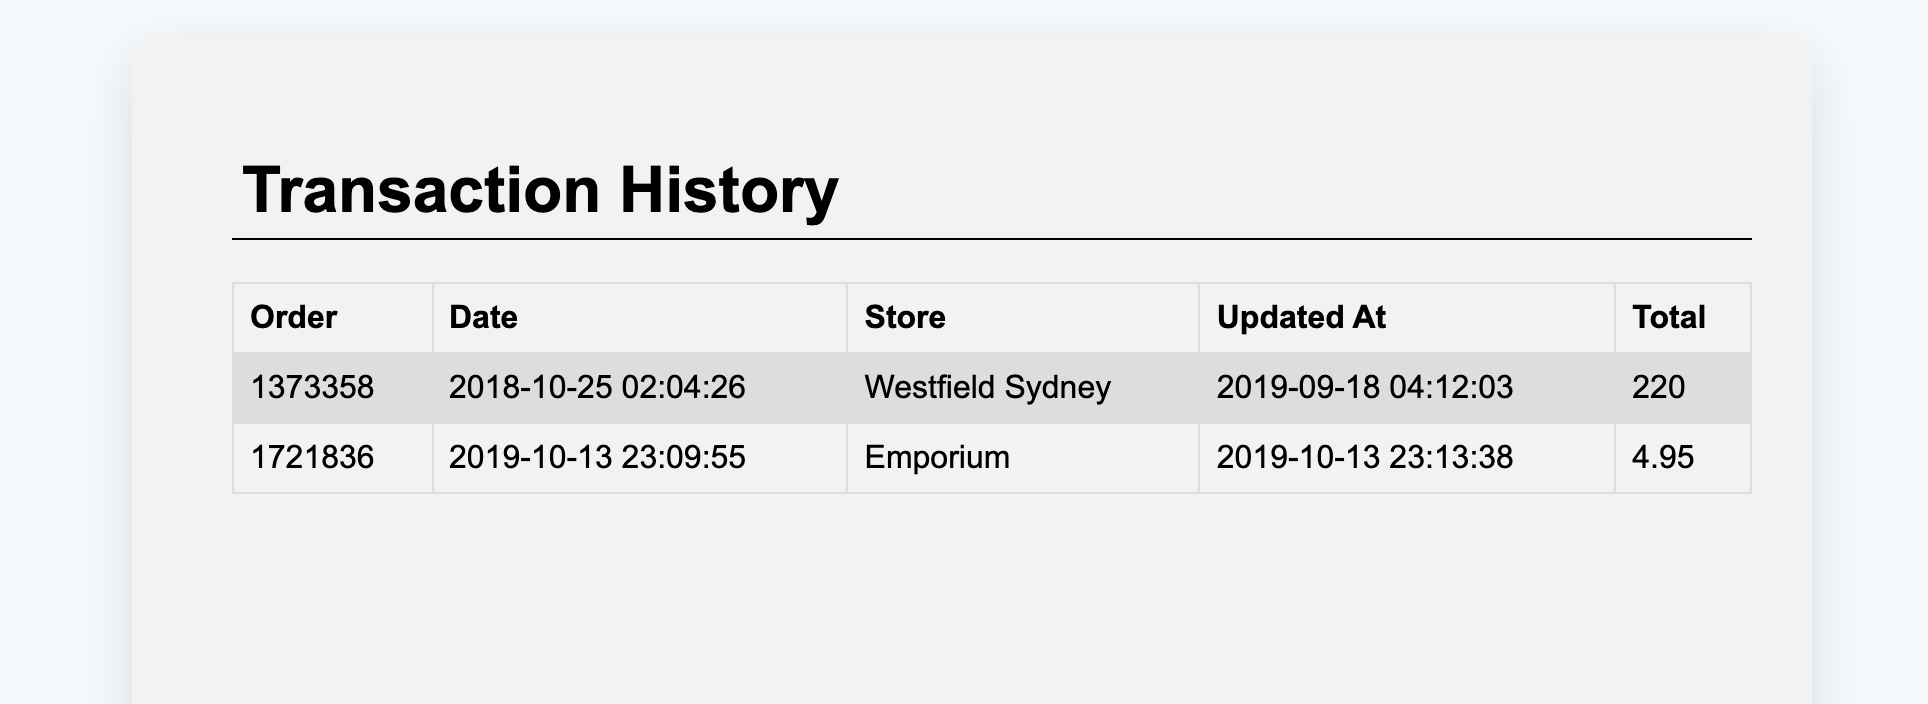
The final result will be a table that displays a customers transactional history.
Data returned from the ShapesSDK.
The ShapesSDK functions as an abstraction layer over the core Omneo API. Because of this, the entire Transactions API applies here. All data returned from the Browse Transactions can be accessed via the data object in the code below in processTransactions
Create a basic HTML document.
The below document has a few fields setup to store our transactional data.
We will be adding table rows to this later.
At the bottom of our <body> the shapes-sdk is imported via the CDN.
<!doctype html>

<html lang="en">
<head>
  <meta charset="utf-8">
  <meta name="viewport" content="width=device-width, initial-scale=1">

  <title>Shapes Transaction History</title>
  <meta name="description" content="Omneo Shapes SDK Demo">

  <meta property="og:title" content="Omneo Shapes">
  <meta property="og:type" content="website">


  <link rel="stylesheet" href="css/styles.css?v=1.0">

</head>

<body>
  <div class="container">
    <div class="transaction-history">
      <div class="transaction-history-content">
        <h1>Transaction History</h1>
        <table id="history-table" class="transaction-history-table">
          <tr>
            <th>Order</th>
            <th>Date</th>
            <th>Store</th>
            <th>Updated At</th>
            <th>Total</th>
          </tr>
        </table>
      </div>
    </div>
  </div>
  <script type="text/javascript" src="https://cdn.omneo.io/shapes-sdk/shapes.sdk.js"></script>
  <script src="js/shapes-sdk.js"></script>
</body>
</html>
Initialising and executing the ShapesSDK
In the above example, we're importing a js file called shapes-sdk.js
This file contains all the logic for pulling data from Shapes, and displaying it in the front end.
The below code can be interpreted in whichever way is needed for the task, but the two most important tasks will always be:
- Initialising the ShapesSDK
// Initialise the ShapesSDK.
// This token is obtained from the Omneo ID Proxy
const shapesClient = window.ShapesSDK.init({
    url: 'https://api.{TENANT}.getomneo.com/id',
    token: "MY_TOKEN",
    logging: true
})
- Hydrating the ShapesClient with transaction data:
This process populates the instance of the ShapesSDK which is available to use on the front end
// Fill the ShapesSDK data layer with transactional data
shapesClient.hydrate('transactions')
- Wait for the hydration to complete, and use the data in the application:
the ShapesSDK emits different events depending on what action as been completed. We can hook into these events and call our callback functions once completed.
// Wait for the shaopes.transactions.ready event to trigger, then call our function
let ready = shapesClient.on("shapes.transactions.ready", populateTransactions)
Full Example of JS
// shapes-sdk.js

const tableFields = ["id", "transacted_at", "location", "updated_at", "total"]

// Process data obtained from .hydrate() and append table rows
// We've set this function to be called after the hydration is complete (line 59)
const populateTransactions = ({ data }) => {
    const tableData = Object.keys(data).map((transaction) => {
        var transactionData = data[transaction];
        var row = document.createElement('tr');
        row.setAttribute("id", transactionData.id)
        row.onclick = () => displayTransactionDetail(transactionData, row)
        tableFields.forEach((field) => {
            row.appendChild(createTableData(transactionData, field))
        })
        return row
    })
    const tableClass = document.getElementById('history-table')
    tableData.forEach(row => tableClass.appendChild(row))
}

const createTableData = (transactionData, field) => {
    var cell = document.createElement('td')
    var cellText = document.createTextNode(transactionData[field].name ?? transactionData[field]);
    cell.appendChild(cellText)
    return cell;
}
// Display additional row showing additional transactional data
const displayTransactionDetail = (data, row) => {
    if(row.getAttribute('expanded') == "true") {
        document.getElementById(`${data.id}-detail`).remove();
        row.setAttribute('expanded', false)
        return
    }

    let detailRow = document.createElement("tr");
    detailRow.setAttribute("id", `${data.id}-detail`)
    detailRow.onclick = () => {
        row.setAttribute('expanded', false)
        detailRow.remove();
    }
    detailRow.innerHTML = `<td colspan=100%>Receipt # ${data.receipt_ref}</td>`;
    row.parentNode.insertBefore(detailRow, row.nextSibling);
    row.setAttribute('expanded', true)

}

// Initialise the ShapesSDK.
const shapesClient = window.ShapesSDK.init({
    url: 'https://api.{TENANT}.getomneo.com/id',
    token: "MY_TOKEN",
    logging: true
})

// Fill the ShapesSDK data layer with transactional data
shapesClient.hydrate('transactions')

// Wait for the hydration of transactions to be complete, and then call populateTransactions
let ready = shapesClient.on("shapes.transactions.ready", populateTransactions)
After a small amount of CSS, the data can be displayed and accessed per customer

Updated almost 3 years ago
